 RetireFlo Resources
← All tutorials
RetireFlo Resources
← All tutorials
Inviting Users & Creating an Agency Account
Bring your team on board — add users to your account and get your agency set up the right way.
Log in and open your dashboard
Everything starts on retireflo.com. Log in if you haven't already, click your name in the top-right corner, and choose My Dashboard. You'll land on a summary of all the surveys you've purchased — the ones you send to your clients and prospects.

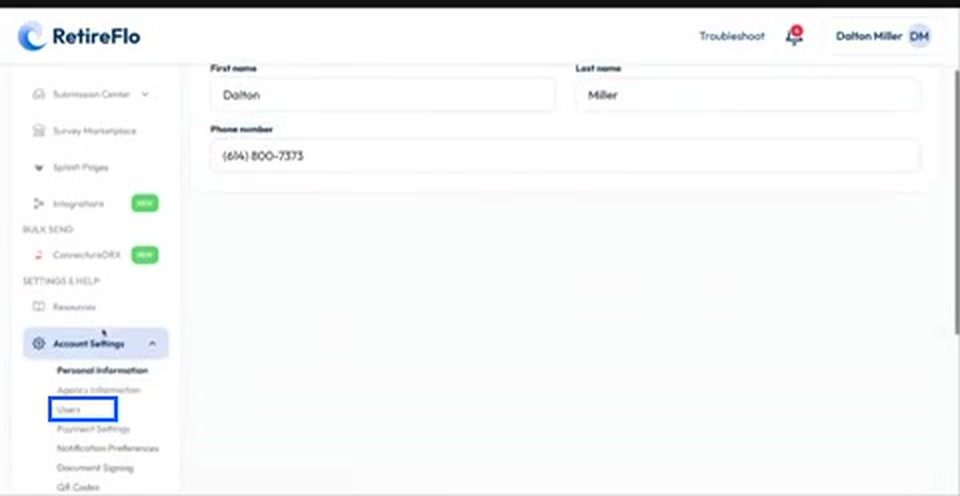
Go to Account Settings → Users
Down at the bottom of the left-hand menu, click Account Settings. A drop-down menu appears — inside it there's a section called Users. This is where you'll invite an administrative assistant, a VA, a downline agent who isn't quite ready for their own survey yet — anybody you'd like on your account.
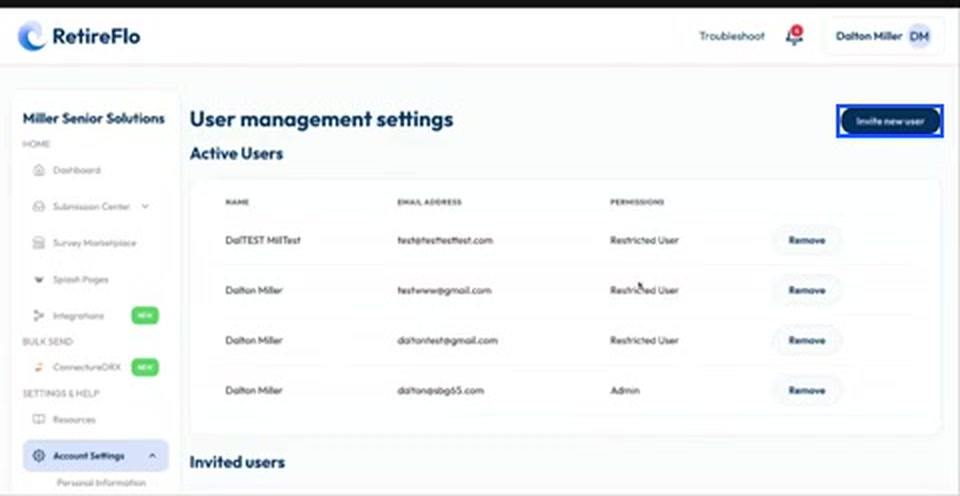
Click “Invite new user”
On the User management settings page you'll see the list of users who can already access your account, plus the people you've invited who haven't accepted yet. When it's time to add someone new, press Invite new user in the top-right corner.
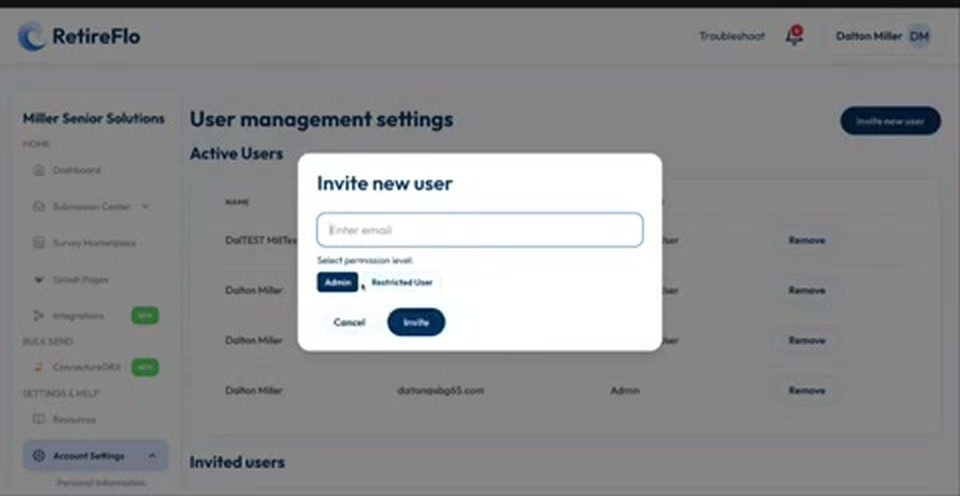
Type their email and pick a permission level
Enter their email address and choose between two types of users. Admin has full access to all data and can control all settings — that's what we recommend 99 times out of 100. If you've got somebody in your business, invite them as an admin. Restricted User is for the agency setup covered in steps 6 and 7. Then press Invite.
Let them accept their invitation
Your invitee immediately receives an email where they create their own username, password, and multi-factor authentication code — so you're not yelling across the room, “I just got this text, here's the code!” They get their own doorway into your dashboard and Submission Center.
Agencies: give each agent their own survey
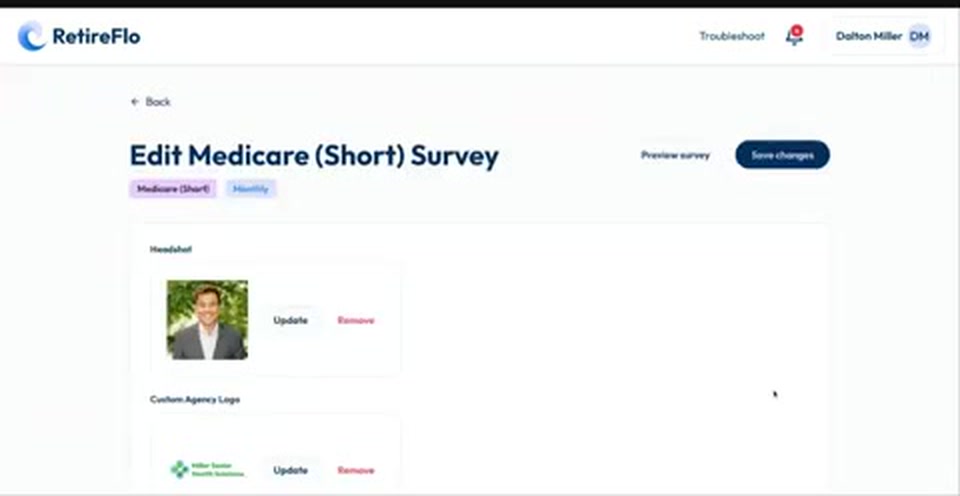
Say you're the agency principal with agent Bob and agent Sarah in your downline. Head to the Survey Marketplace, select a survey, and build one with Bob's headshot and Bob's logo — then repeat for Sarah. If you have a large agency, we highly recommend each agent has their own individual survey. It's really important for branding, and it builds efficacy and trustworthiness.
Tag restricted agents under Page Permissions
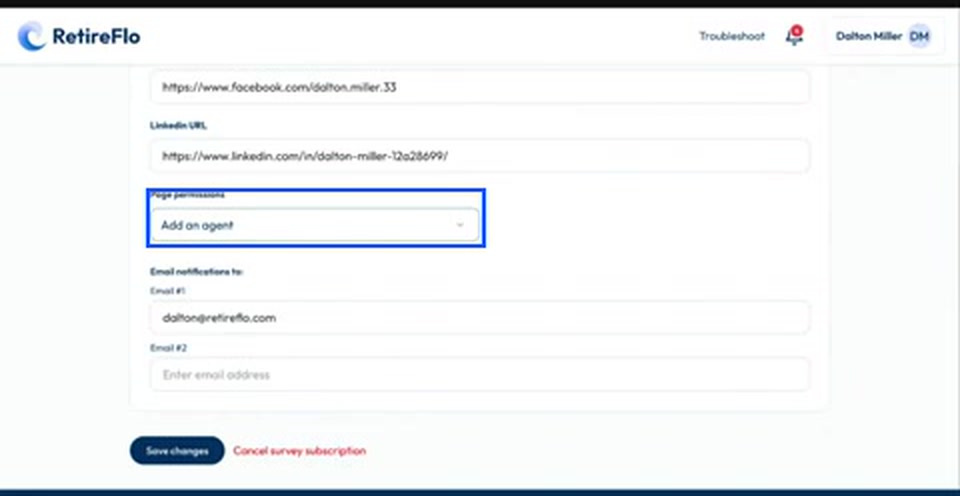
Invite Bob and Sarah as Restricted Users (same Users page, same process). Once they've accepted, there's one more step: open your dashboard, click Manage on Bob's survey, and scroll about three-quarters of the way down to the Page permissions section. Pick Bob's name from the drop-down of restricted users who've accepted. That tags Bob to Bob's survey — he can see it and view its submissions just like you can, but Sarah can't see his, and vice versa. You, as agency principal, see all.
Good to know
- Inviting users is totally free. It comes at no cost — it's just a benefit of the platform. Other software tools will probably charge you for that; RetireFlo doesn't.
- Going back and forth on the permission level? Invite them as an admin. It's better, it's easier, it makes everything work faster.
- What costs money: purchasing surveys — there's a clear add-to-cart flow for that. Highly recommended for agencies with multiple agents building their own brands.
Still stuck?
Grab a time with the RetireFlo team and we'll walk through it with you — or ask the community, someone's always online.